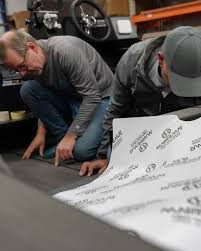
Do it yourself or outsource it to us
Installing Yourself? Here’s How to Do It:
Preparation: Thoroughly clean the surface to be covered. Brush or vacuum the floor well.
Degreasing: Degrease the surface well. You can do this with white spirit.
Resting: After degreasing, let the floor rest for a while. The degreaser should evaporate to ensure optimal adhesion.
Order: Determine the order in which you will lay the parts. Always start with a part that, for example, has a table leg cut out. This must be perfectly centered.
Cutting: Take the first part to be laid and place it face down. Use a sharp utility knife to cut through the protective layer (like a sticker) in the middle. Be careful not to cut through the material itself, just the protective layer. Fold both sides back about 2 cm to create a narrow adhesive strip in the middle.
Sticking: Place the part correctly and press the adhesive strip down gently. Make sure the part is positioned well. Then press the adhesive strip down firmly. Weight down one part with your hand or foot so you can remove the protective layer from the other part. Smooth out all air from that part with your hand from the center outward. You’re halfway there. Now remove the protective layer from the other half and smooth out all air from that part with your hand from the center outward.
Pressing Down: Then press the stuck part down well with, for example, a hand roller, pressure roller, or roller. Pressing firmly with a cloth also works. Do not rub! This can damage any thin edges.
Repeating: Repeat steps 5 to 7 until all parts are installed.
Checking: A few hours after installation, we advise you to go over all parts, especially the edges, by pressing them down again firmly.
Your custom-made floor is installed, now the enjoyment can begin!
Outsourcing Installation to Us? Here’s Our Method:
If we need to install it for you, the boat must be in Vriezenveen. Under certain conditions, we can also install on-site. Our method is the same as the one described above.